 Save
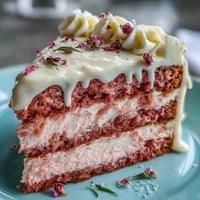
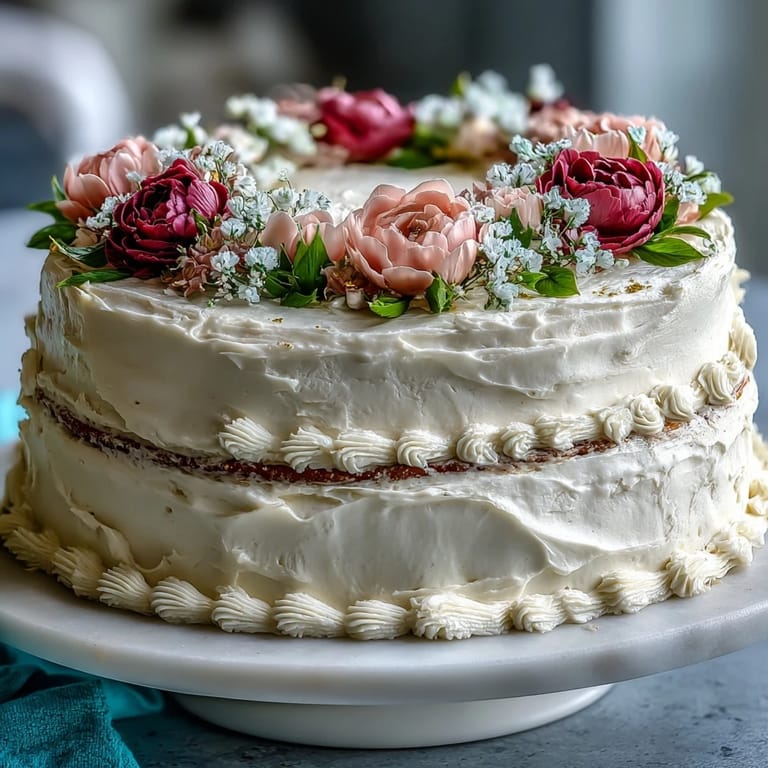
Save My friend texted me two weeks before her graduation asking if I could bake something that felt like a celebration, something that honored both her Taurus stubbornness and her actual accomplishment. I found myself at the kitchen counter on a Saturday morning, creaming butter and sugar while she FaceTimed me updates from her cap-fitting appointment, and somehow this vanilla cake with its delicate floral buttercream became the thing that tied it all together.
When I pulled those three layers from the oven, the kitchen smelled like pure comfort, and I realized this cake works because it doesn't try too hard to be impressive—it just is. My sister came home mid-bake, asked if she could help with the flowers, and suddenly decorating became this meditative thing we did together, piping delicate petals while listening to music and talking about growing up.
Ingredients
- All-purpose flour (2 1/2 cups): The foundation of a tender crumb; make sure it's measured correctly or your cake can become dense and heavy.
- Baking powder (2 1/2 tsp): This gives you that gentle lift; don't skimp or substitute with baking soda without adjusting other ingredients.
- Salt (1/2 tsp): A tiny but essential amount that amplifies the vanilla without making the cake taste salty.
- Unsalted butter for cake (1 cup): Room temperature is non-negotiable; cold butter won't cream properly and you'll lose that fluffy texture.
- Granulated sugar (2 cups): This creams with the butter to trap air bubbles, which is literally where your cake's structure comes from.
- Large eggs (4): Room temperature eggs emulsify smoothly into the batter; cold ones can cause the mixture to break and separate.
- Pure vanilla extract (1 tbsp): The star of the show; pure extract tastes worlds better than imitation, and you'll notice it in every bite.
- Whole milk (1 cup): Room temperature milk prevents shocking the batter and keeps the crumb delicate.
- Unsalted butter for frosting (1 1/2 cups): Softened to the point where a finger leaves a slight indent—too soft and the buttercream won't hold its shape.
- Powdered sugar (5 cups): Sifted removes lumps that create a grainy frosting texture no matter how long you beat it.
- Vanilla extract for frosting (2 tsp): The same quality rule applies; this makes the buttercream taste like something worth celebrating.
- Heavy cream or milk (2-4 tbsp): This is your consistency control; add it gradually so you don't accidentally thin the frosting into a glaze.
- Gel food coloring: Gel doesn't add liquid like liquid colors do, which means your frosting stays stiff enough for piping.
- Edible gold leaf or sprinkles: Optional but transforms the cake into something ceremonial; even a small amount catches the light beautifully.
- Piping bags and tips: Invest in a petal tip and a leaf tip; they make floral designs surprisingly achievable for anyone willing to try.
Tired of Takeout? 🥡
Get 10 meals you can make faster than delivery arrives. Seriously.
One email. No spam. Unsubscribe anytime.
Instructions
- Prepare your stage:
- Preheat the oven to 350°F and grease three 8-inch round pans with parchment paper circles on the bottoms. This matters more than you think because it prevents sticking and lets you turn the cakes out with confidence.
- Combine your dry ingredients:
- Whisk flour, baking powder, and salt together in one bowl so the leavening distributes evenly through the batter. This small step prevents dense pockets in your finished cake.
- Create the butter-sugar base:
- Beat softened butter and sugar for 3-4 minutes until it looks pale, fluffy, and cloud-like; this incorporates air that becomes your cake's structure. Stop when it looks lighter than when you started.
- Add eggs with care:
- Add eggs one at a time, waiting for each to fully incorporate before adding the next, then mix in vanilla. This gradual approach keeps the batter emulsified instead of looking curdled or broken.
- Alternate wet and dry:
- Add the flour mixture and milk in three additions, starting and ending with flour, mixing only until you don't see streaks of flour. Overmixing activates gluten and creates a tough crumb you don't want.
- Fill and bake:
- Divide batter evenly among the three pans and smooth the tops gently, then bake for 28-35 minutes until a toothpick comes out clean or with just a few moist crumbs. Let them cool in the pans for 10 minutes to set slightly, then transfer to wire racks for complete cooling before decorating.
- Prepare the buttercream:
- Beat softened butter on medium speed until creamy and pale, about a minute, then gradually add sifted powdered sugar while continuing to beat. This prevents powdered sugar clouds from coating your entire kitchen.
- Reach the right consistency:
- Mix in vanilla and 2 tablespoons of cream, then beat for another 3-4 minutes until fluffy and spreadable; add more cream by the teaspoon if it seems too stiff. The goal is something thick enough to hold peaks but soft enough to spread without tearing the cake.
- Color your frosting:
- Divide buttercream into separate bowls and add gel coloring drop by drop, stirring until you reach your desired floral shades. Gel colors are potent, so add conservatively or you'll end up with frosting that looks neon instead of naturally floral.
- Level and layer:
- Check if your cooled cake layers are domed and level them if needed with a serrated knife, then place the first layer on a serving plate or cake board. Spread an even layer of buttercream on top, then repeat with the remaining layers.
- Apply the crumb coat:
- Spread a thin layer of buttercream over the entire cake, seal in any crumbs, then chill for 20 minutes so the crumbs don't drag into your final frosting coat. This step feels like extra work but prevents a rough, speckled appearance.
- Create a smooth canvas:
- Apply your final coat of buttercream, making it as smooth as you'd like using an offset spatula, a bench scraper, or even a straight knife dipped in warm water. Some people love perfectly smooth cakes while others embrace the rustic look; both are beautiful.
- Pipe the flowers:
- Using colored buttercream and piping tips, pipe delicate flowers, leaves, and vines around the cake, starting with a test flower on parchment if you're nervous. Piping feels intimidating until you realize flowers don't need to be perfect—they just need to exist with intention.
- Add the finishing touch:
- Incorporate the Taurus symbol or graduation cap accent using gold leaf, edible marker, or gold sprinkles to personalize the design. This transforms the cake from beautiful into meaningful.
- Chill and serve:
- Refrigerate the finished cake until you're ready to serve, then bring it to room temperature for about 30 minutes so the buttercream softens and tastes its best. Cold buttercream is dense; room temperature buttercream is silky and dissolves on your tongue.
 Save
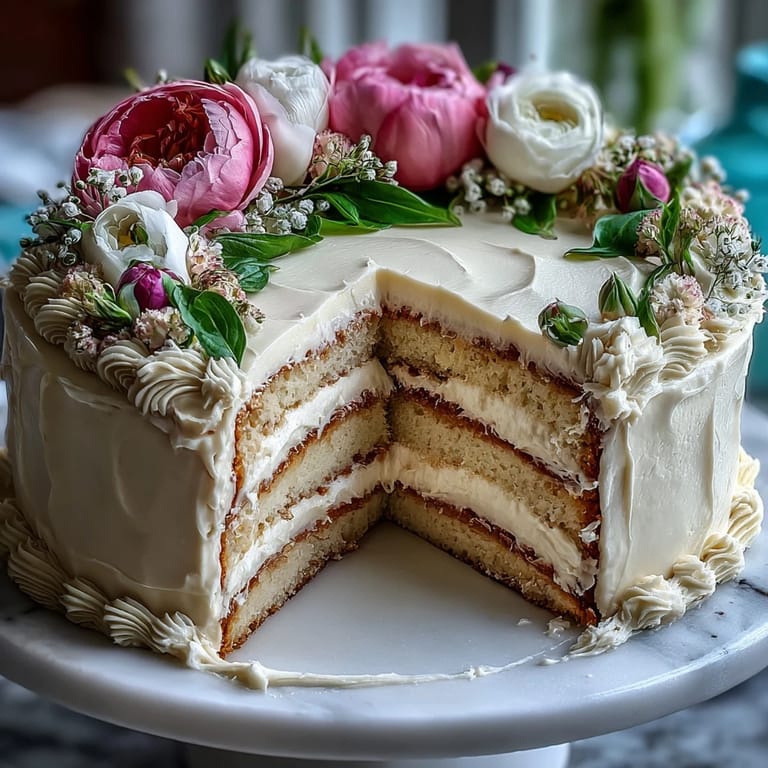
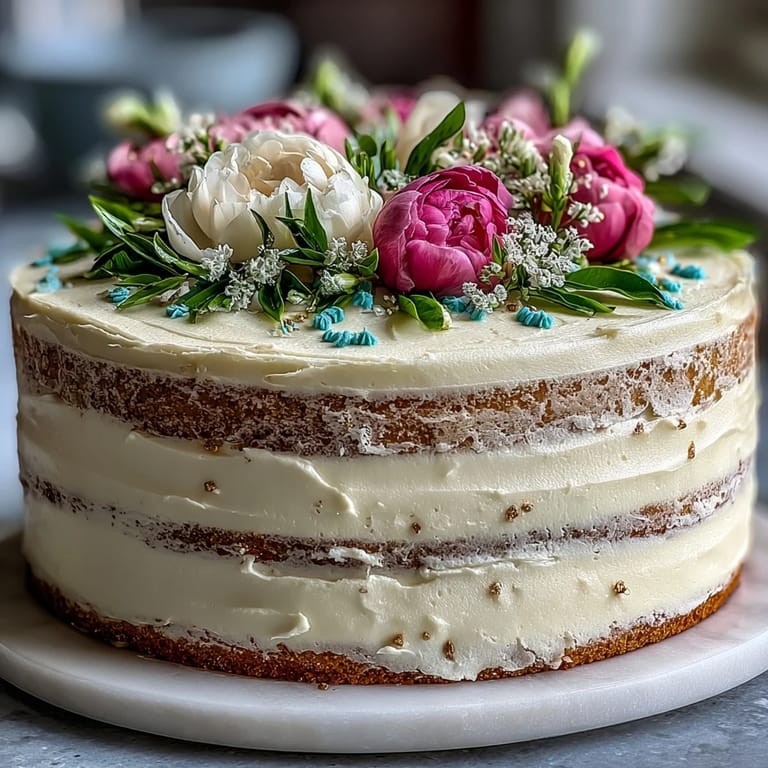
Save At the graduation party, my friend cut into the cake and people actually paused to admire the floral work before diving in, and that moment—where something functional became something worth photographing—is when I understood why we bake for celebrations. The cake tasted like exactly what it should: vanilla comfort dressed up for an occasion, making everyone at the table feel honored.
The Psychology of Celebration Cakes
There's something about baking a multi-layer cake for someone that says you believe they're worth the time and effort. When you're in the kitchen for hours—creaming, baking, cooling, piping—you're essentially saying that this person's accomplishment matters enough to spend your afternoon on it. Vanilla cake with floral buttercream specifically carries an understated elegance that doesn't scream for attention but quietly insists on being admired.
Customizing for Your Celebration
The beauty of this cake is how personal it becomes once you start decorating. If your graduate is into astrology, you can pipe their zodiac symbol; if they're into their school, you can incorporate school colors into the buttercream. One friend made this cake for her sister's promotion and piped tiny briefcases between the flowers, which sounds ridiculous until you see it and realize it's exactly right. The foundation stays the same—reliable, delicious vanilla cake—but the decoration tells the specific story of who you're celebrating.
Troubleshooting in Real Time
If your buttercream looks grainy, you didn't sift the powdered sugar thoroughly enough; push it through a fine mesh sieve next time and it will transform. If the layers slip when you're stacking, don't panic—a few dowels pushed through the layers will add support without being visible once decorated. If your piping feels clumsy, remember that nobody expects botanical accuracy; small imperfect flowers look more charming than perfectly symmetrical ones.
- A turntable makes decorating easier but isn't essential; you can rotate the cake on any spinning surface or just work your way around stationary.
- If the cake is too warm when you frost it, the buttercream will melt off; patience with cooling is genuinely the secret that separates good cakes from great ones.
- Gel colors are your friend here because liquid colors will thin your frosting, but start with half the amount you think you need and build from there.
 Save
Save This cake exists to mark moments that matter, to turn an accomplishment into something you can taste and remember. Bake it with the confidence that you're making something worthy of the occasion.
Recipe FAQs
- → What flour is best for this cake?
All-purpose flour is recommended for a balanced texture and crumb suitable for layered cakes.
- → How do I achieve vibrant buttercream colors?
Use gel food coloring for concentrated shades without thinning the buttercream consistency.
- → Can I prepare decorations in advance?
Yes, piping floral decorations on parchment and chilling them allows for easier transfer later.
- → What’s the best way to layer the cake evenly?
Level cooled cake layers with a serrated knife or cake leveler to create flat, even surfaces for stacking.
- → How should I store the finished cake?
Refrigerate after decorating to set the buttercream, then bring to room temperature before serving for optimal flavor.