Save
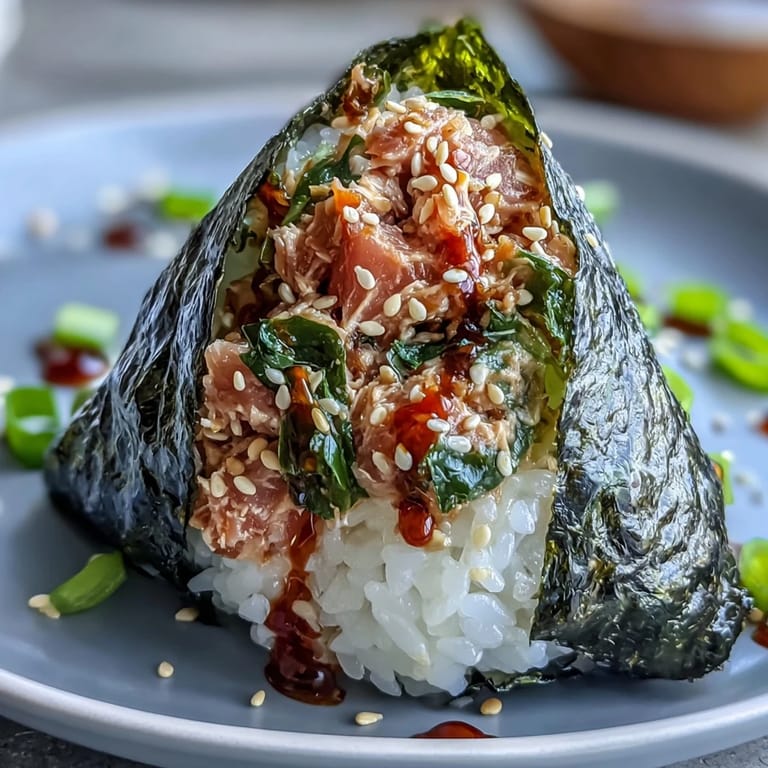
Save My coworker handed me one of these during a lunch break, and I bit into it expecting something ordinary—then the spicy tuna hit my tongue and I understood why she made a batch every Sunday. There's something about the way the cool, seasoned rice gives way to that creamy, umami-packed filling that makes you want another immediately. What started as curiosity became my go-to portable meal, and now I find myself shaping these triangles while standing at my kitchen counter, sometimes humming without realizing it.
I made these for a picnic last summer, and my friend took one bite, then immediately asked for the recipe while sitting on a blanket overlooking the water. That's when I realized this wasn't just convenient food—it was something special enough to crave. Now whenever someone visits, they expect a batch waiting in the fridge.
Ingredients
- Japanese short-grain rice: The starch content makes it clingy and perfect for shaping; regular long-grain rice will fall apart in your hands.
- Rice vinegar, sugar, and salt: These three create the subtle tang that makes the rice taste like actual sushi rice without needing a fancy seasoning kit.
- Canned or sushi-grade tuna: Canned is convenient and reliable, but if you can find sushi-grade tuna, the texture becomes buttery and the flavor deepens noticeably.
- Kewpie mayonnaise: The Japanese version has more egg yolk than regular mayo, giving a richer taste—but don't stress if you only have standard mayo on hand.
- Sriracha: Start with less than you think you need; this stuff builds heat as it sits.
- Sesame oil and soy sauce: These two ingredients do the heavy lifting flavor-wise, bringing that toasted, savory depth.
- Green onion: Chopped fine, it adds a bright, fresh bite that cuts through the richness of the mayo.
- Nori sheets: Look for the dark green kind sold in sheets; it should smell briny and slightly oceanic.
Tired of Takeout? 🥡
Get 10 meals you can make faster than delivery arrives. Seriously.
One email. No spam. Unsubscribe anytime.
Instructions
- Rinse and cook the rice:
- Run the rice under cold water, swirling with your fingers, until the water comes out almost clear—this removes excess starch so your onigiri won't be gluey. Cook according to your rice cooker or pot instructions, then let it rest covered for 10 minutes so the grains finish setting.
- Season the rice while warm:
- Mix the vinegar, sugar, and salt in a small bowl until the sugar dissolves completely, then gently fold it into the warm rice using a rice paddle or wooden spoon. The warmth helps the rice absorb the seasoning evenly, and being gentle prevents the grains from breaking into mush.
- Make the spicy tuna mixture:
- Combine the drained tuna, mayo, Sriracha, soy sauce, sesame oil, and chopped green onion in a bowl and stir until everything is incorporated. Taste a tiny bit and adjust the Sriracha if you want it milder or spicier.
- Prepare your shaping station:
- Fill a small bowl with water for wetting your hands and another with a pinch of salt for lightly salting them—this prevents the rice from sticking while you shape. Having everything set up before you start makes the process smooth and keeps you from getting frustrated partway through.
- Shape the onigiri:
- Wet your hands, sprinkle them lightly with salt, and scoop about 1/2 cup of cooled rice into your palm. Press it gently into a flat disc, then add 1 to 2 teaspoons of the spicy tuna mixture to the center and fold the rice around it, shaping it into a triangle as you press firmly but not aggressively—you want it compact enough to hold its shape but not squeezed to death.
- Add the nori wrapper:
- Cut your nori sheets in half, then wrap one strip around the bottom third of each onigiri, pressing gently so it sticks to the rice. If you want to be fancy, sprinkle some toasted sesame seeds on top right before serving.
- Serve or store:
- Eat them straight away if you like them at room temperature, or wrap each one in plastic wrap and refrigerate if you're making them ahead—they'll keep for about a day without the nori getting too chewy.
 Save
Save There's a moment when your hands are covered in rice, the kitchen smells like sesame and ocean, and you realize you're making something with your own hands that tastes as good as something from a restaurant. That quiet satisfaction, paired with the knowledge that you've made lunch for the next few days, feels small but somehow really good.
The Secret to Perfect Rice Seasoning
The biggest lesson I learned came from a disappointment—I once made the vinegar mixture and poured it into hot rice that had been sitting for too long, and it tasted flat and somehow tangy in the wrong way. Now I make sure the rice is still steaming but not blazing hot, and I fold the seasoning in gently rather than stirring aggressively. The difference is remarkable: the rice absorbs the flavor evenly and stays tender instead of becoming mushy or dried out.
Why Kewpie Makes a Difference
I was skeptical at first about splurging on Japanese mayo until I compared them side by side, and the Kewpie version was noticeably creamier and richer, with almost a butter-like quality. It's not essential—regular mayonnaise absolutely works—but if you ever see it in your grocery store, it's worth grabbing for this recipe. The yolk-to-oil ratio in Kewpie just happens to complement spicy tuna in a way that feels intentional, not accidental.
Building Your Filling Flavors
The beauty of the spicy tuna filling is that each ingredient has a job: the mayo brings creaminess, the Sriracha brings heat, the soy sauce and sesame oil bring umami and toasted depth, and the green onion brings freshness. When they work together, it's balanced and crave-worthy; when one element is missing, you notice immediately. I once forgot the sesame oil by accident and the whole thing tasted flat and one-dimensional, which taught me to respect the formula while still feeling free to adjust the spice level to suit your palate.
- Start conservatively with the Sriracha: You can always add more, but you can't take heat out once it's mixed in.
- Use sushi-grade tuna if you're feeling adventurous: It's more delicate and buttery than canned, and changes the whole experience.
- Chop the green onion fine: Chunks of green onion can feel jarring; small pieces distribute the flavor more evenly.
 Save
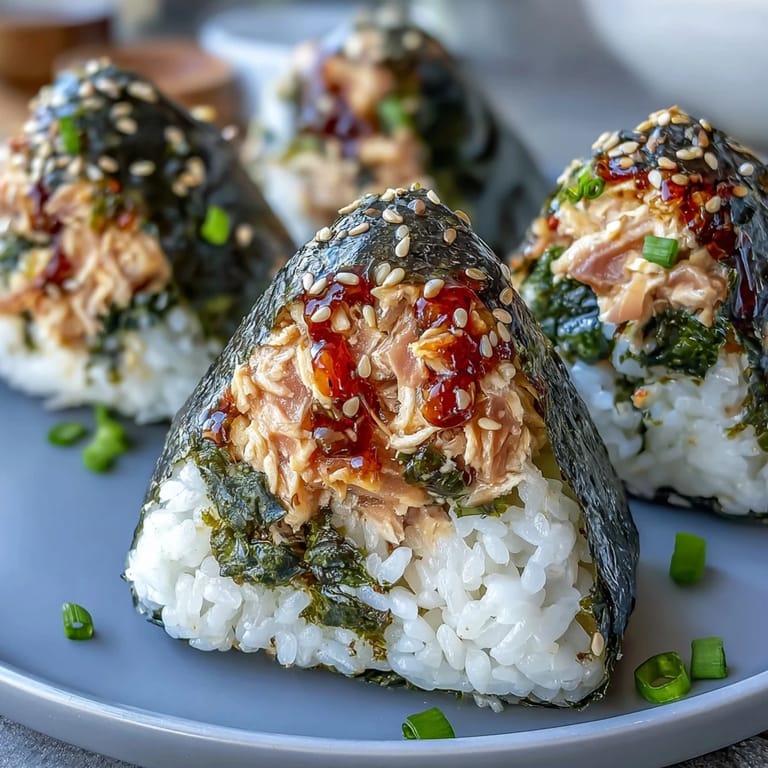
Save These rice balls have become my answer to almost every lunch situation—they're satisfying enough to be a full meal, portable enough to eat standing up, and delicious enough to make you forget you're eating something you made yourself. That combination is rare, and worth making again and again.
Recipe FAQs
- → What type of rice is best for onigiri?
Japanese short-grain rice works best as it becomes sticky when cooked, helping the onigiri hold its shape.
- → Can I use raw tuna instead of canned?
Yes, sushi-grade raw tuna finely diced provides a fresher taste but ensure it's handled safely.
- → How spicy is the tuna filling?
The spiciness can be adjusted by varying the amount of sriracha or hot sauce to suit your preference.
- → What’s the role of nori in this dish?
Nori adds a savory oceanic flavor and acts as a convenient wrapper, making the onigiri easy to hold and eat.
- → Can these be prepared ahead of time?
Yes, wrap them tightly in plastic wrap and refrigerate; best eaten within a day for optimal freshness.