 Save
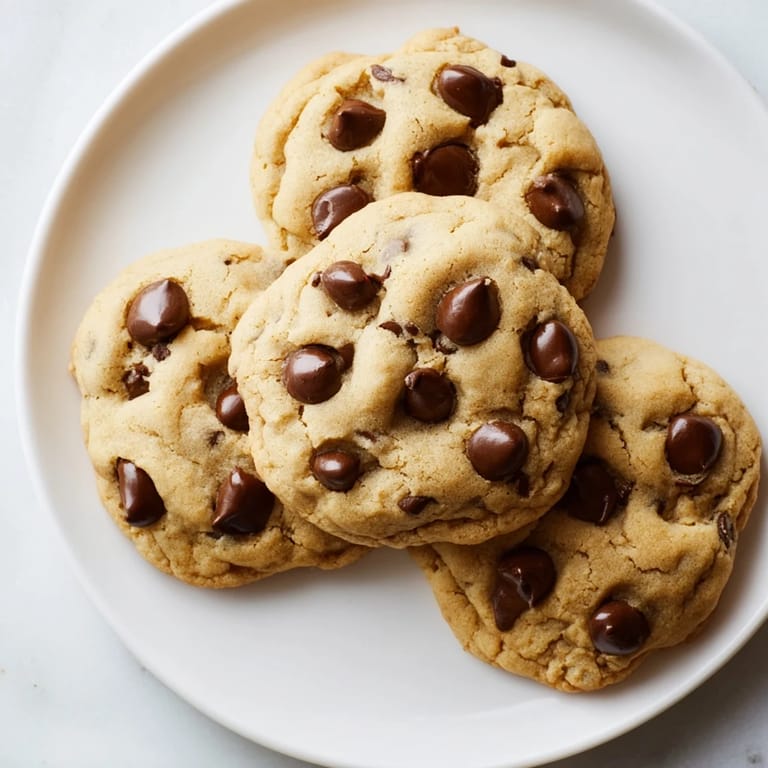
Save There's something about the smell of butter and brown sugar hitting a hot oven that makes everything feel right. My neighbor once described her kitchen during cookie season as smelling like a bakery had exploded in the best way possible, and I knew exactly what she meant. These chocolate chip cookies are the kind you pull from the oven when the edges are just turning golden and the centers still look impossibly soft—because they are, and that's the whole point. I learned this the hard way after years of overbaking them into hockey pucks, thinking crunch was the goal. Now I understand that the magic happens in those few seconds between underbaked and perfect.
I made these for my daughter's school bake sale years ago, and they sold out before the first bell rang. A parent I barely knew tracked me down in the carpool line to ask for the recipe, and I realized these weren't just cookies—they were the kind of thing that makes people feel cared for. She still texts me around the holidays to say she's making them again.
Ingredients
- All-purpose flour (2 1/4 cups): This is your structure—don't sift it unless you want to complicate your life, but do spoon it gently into the measuring cup and level it off so you're not adding extra weight.
- Unsalted butter (1 cup), softened: Cold butter won't cream properly, so pull it out of the fridge 30 minutes before you start, or cut it into chunks and let it sit on the counter—you want it soft enough to leave a fingerprint impression.
- Granulated and brown sugar (3/4 cup each): The combination gives you both structure and chew; brown sugar alone would make them too soft and spread too much.
- Eggs (2 large): Room temperature eggs incorporate more smoothly and create a better emulsion with the butter and sugars.
- Pure vanilla extract (2 teaspoons): Don't cheap out here—imitation tastes flat by comparison, and this recipe is too simple to hide mediocre ingredients.
- Baking soda (1/2 teaspoon): This is your leavening agent and browning accelerant; it's what helps them puff slightly and get those golden edges.
- Salt (1/2 teaspoon): A pinch of salt doesn't make them taste salty—it wakes up the chocolate and balances the sweetness in a way that feels sophisticated without being obvious.
- Semi-sweet chocolate chips (2 cups): Use the good stuff, or at minimum chips that aren't waxy and flavorless; they make up half the personality of these cookies.
Tired of Takeout? 🥡
Get 10 meals you can make faster than delivery arrives. Seriously.
One email. No spam. Unsubscribe anytime.
Instructions
- Get your mise en place ready:
- Preheat your oven to 350°F and line two baking sheets with parchment paper—this matters because it prevents sticking and helps them bake evenly. Having everything measured and ready before you start means you won't rush or forget something halfway through.
- Combine the dry ingredients:
- In a medium bowl, whisk together flour, baking soda, and salt and set it aside. This distributes the leavening evenly so you get consistent rise throughout all 24 cookies.
- Cream the butter and sugars:
- Beat softened butter with both sugars for about two minutes until the mixture looks pale, fluffy, and noticeably lighter than when you started. You're incorporating air here, which helps the cookies rise and creates that tender crumb.
- Add the eggs and vanilla:
- Drop in one egg at a time, beating well between additions so each one fully incorporates before the next one joins the party. Then add the vanilla and beat another 30 seconds.
- Fold in the dry mixture:
- Add the flour mixture to the wet ingredients and stir just until combined—this is where patience pays off. Overmixing develops gluten and makes them tough instead of tender, so stop as soon as you don't see any white streaks of flour.
- Distribute the chocolate:
- Fold in the chocolate chips gently with a spatula so they're spread throughout rather than clumped in one corner. You want every cookie to feel like you got a fair share of chocolate.
- Scoop and space your dough:
- Drop rounded tablespoons of dough onto the prepared sheets about two inches apart, using your fingers or a cookie scoop. They'll spread as they bake, so don't crowd them.
- Bake until golden edges meet soft centers:
- Bake for 10 to 12 minutes—the edges should be golden brown while the centers still look a tiny bit underbaked and soft. They continue cooking on the hot pan after you pull them out, so trust this timing.
- Cool in stages:
- Let them rest on the baking sheets for five minutes so they set enough to move without falling apart, then transfer them to a wire rack to cool completely. This two-stage cooling is the difference between cookies that hold together and cookies that crumble.
 Save
Save My mom used to bake these on Sunday afternoons when we were kids, and the smell would pull everyone out of whatever they were doing and into the kitchen. Years later, I realized she wasn't just making cookies—she was creating a signal that said the weekend was still ours, that there was time for something small and good before Monday came.
The Science of Soft and Chewy
The magic in these cookies lives in the ratio of brown sugar to granulated sugar and the exact moment you remove them from the oven. Brown sugar holds more moisture because of its molasses content, which keeps the centers soft and fudgy even as the edges crisp up slightly. If you want them chewier, lean toward more brown sugar; if you prefer them slightly cakier, use a touch more granulated. Temperature matters too—a slightly cooler oven (325°F instead of 350°F) gives you more time for the centers to set while staying tender, though you'll lose a bit of that golden-brown edge.
Variations That Actually Work
I've played with these cookies enough times to know which swaps make them better and which ones just make them different in a way that doesn't quite land. Dark chocolate chips bring a sophisticated bitterness that's wonderful if you're not a pure-sugar person; milk chocolate chips are sweeter and almost melting in their softness. Chopped nuts—walnuts or pecans—add texture and a toasted note that bridges the gap between simple and complex.
Storage and Keeping Them Around
These cookies stay soft for about five days in an airtight container at room temperature, though they rarely last that long in my house. If you want them to keep longer, you can freeze the dough in balls for up to three months and bake fresh cookies whenever the craving hits—there's something satisfying about having fresh cookies available on your own timeline. A cool kitchen keeps them softer than a warm one, so if you live somewhere hot, the fridge is your friend for storage.
- Keep them in an airtight container away from crunchy cookies or crackers, which will steal their moisture.
- If they've hardened, a slice of bread in the container overnight will soften them back up as it gives up its moisture.
- Let them cool completely before storing or they'll steam themselves into mushiness.
 Save
Save These cookies remind me that sometimes the most important recipes are the simple ones, the ones you can make with your hands and share with people you care about. They've shown up at bake sales and late-night study sessions, have been shipped across states and made by people I've never met, and in their own quiet way, they've become part of people's lives.
Recipe FAQs
- → What makes these cookies soft and chewy?
The combination of creamed butter and sugars, along with careful mixing and baking times, helps maintain a soft, chewy texture with melty chocolate chips.
- → Can I use different types of chocolate chips?
Yes, you can substitute semi-sweet chips for dark, milk, or white chocolate to suit your taste preferences.
- → Is chilling the dough necessary?
Chilling the dough for 30 minutes enhances flavor and helps control spreading during baking, resulting in thicker cookies.
- → How should I store the baked treats?
Store them in an airtight container at room temperature for up to five days to keep them fresh and soft.
- → Can nuts be added to the dough?
Yes, feel free to fold in chopped walnuts or pecans to add texture and flavor variations.
- → What kitchen tools are recommended?
Using mixing bowls, an electric mixer or whisk, measuring tools, baking sheets, parchment paper, and a wire rack will simplify preparation and baking.