 Save
Save My grandmother kept a ceramic dish in her kitchen cabinet that only came out for special occasions, and banana pudding was the reason. The first time she let me help assemble it, I was maybe seven, standing on a step stool to reach the counter, watching her layer those vanilla wafers with such care. She'd say the secret wasn't in rushing it, but in letting everything get to know each other in the cold. Now, whenever I make this, I find myself moving at her pace, understanding what she meant about patience and desserts.
There was a summer when my sister came home with her new partner, and I wanted to make something that felt both impressive and honest. I chose this because it's the kind of dessert that gets people talking, not about the technique or the Instagram factor, but about their own memories. Watching them eat it, I realized this dish is a conversation starter in the best way.
Ingredients
- Granulated sugar (3/4 cup): This sweetens the entire pudding base, and I've learned that granulated dissolves smoothly into the milk without grittiness if you whisk it in gradually.
- Cornstarch (1/4 cup): The thickening agent that makes the pudding luxurious instead of runny, and you need to whisk it well with the sugar first to prevent lumps.
- Salt (1/4 tsp): Just a pinch to deepen the vanilla flavor and balance the sweetness, which sounds tiny but makes a real difference.
- Whole milk (3 cups): Use the full-fat version; it's worth the richness and creates a smoother, more forgiving pudding.
- Large egg yolks (4): These enrich the pudding and help thicken it further, but tempering them is crucial so you don't end up with scrambled eggs.
- Unsalted butter (2 tbsp): Adds silky texture and a subtle richness that makes the pudding feel indulgent.
- Vanilla extract (2 tsp): This is your flavor backbone, so use real vanilla extract, not imitation, if you can.
- Vanilla wafers (one 340 g box): Don't skip the name-brand ones if you can help it; the texture and flavor really do matter in this dessert.
- Medium ripe bananas (4): Not yellow-bright-green, and not brown-spotted; aim for that golden stage where they're sweet but still slightly firm.
- Heavy cream (1 cup): For whipping, and it should be cold straight from the fridge for best results.
- Powdered sugar (2 tbsp): For the topping, sifted so there are no lumps that won't incorporate into the cream.
Tired of Takeout? 🥡
Get 10 meals you can make faster than delivery arrives. Seriously.
One email. No spam. Unsubscribe anytime.
Instructions
- Create the pudding base:
- Whisk sugar and cornstarch together in a medium saucepan first, then gradually add milk while whisking to avoid lumps. This step takes patience but prevents gritty pudding.
- Cook until thickened:
- Heat over medium, stirring constantly, until it bubbles and thickens, about 6 to 8 minutes. You'll feel when it's right, the spoon will move through it with slight resistance.
- Temper the egg yolks:
- Beat yolks in a separate bowl, then slowly whisk in about half a cup of the hot pudding mixture to warm them gradually. This keeps them from scrambling when you add them back.
- Finish the pudding:
- Return the yolk mixture to the saucepan, stirring constantly for another 2 to 3 minutes until silky and thick. Remove from heat and stir in butter and vanilla until completely combined.
- Cool the pudding:
- Pour into a bowl, press plastic wrap directly onto the surface, and let it cool completely, then refrigerate for about an hour. The plastic wrap prevents a skin from forming.
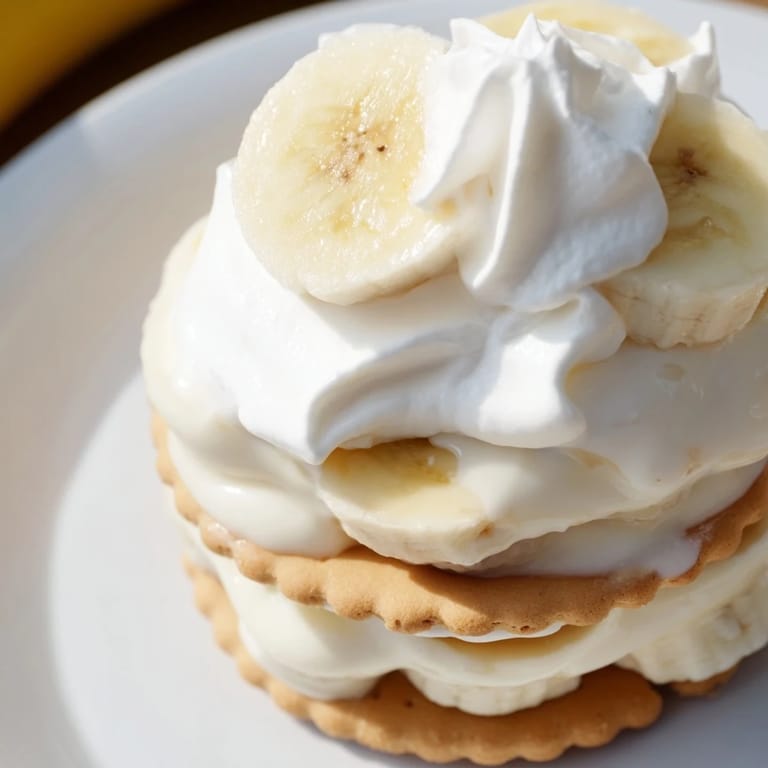
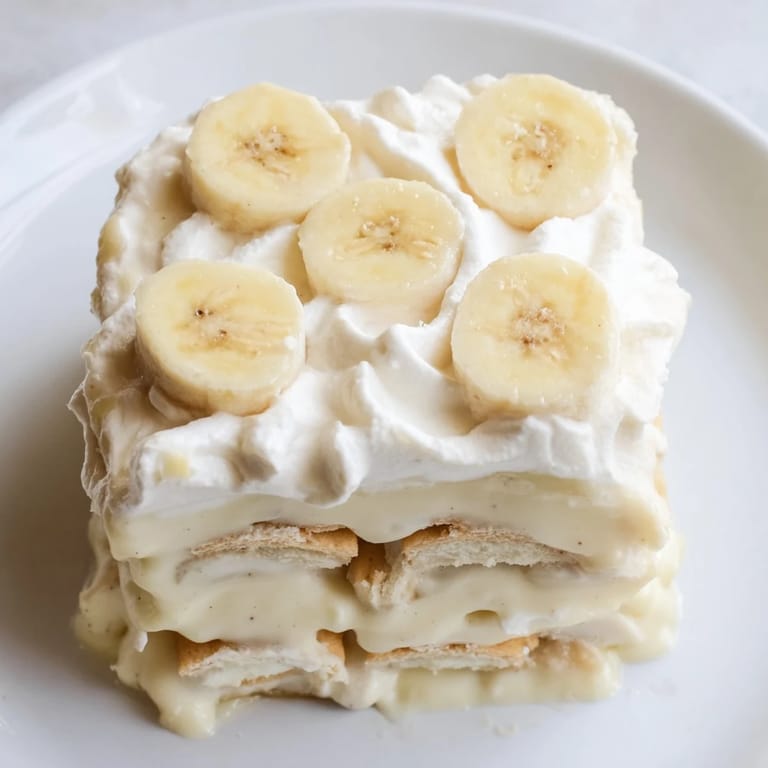
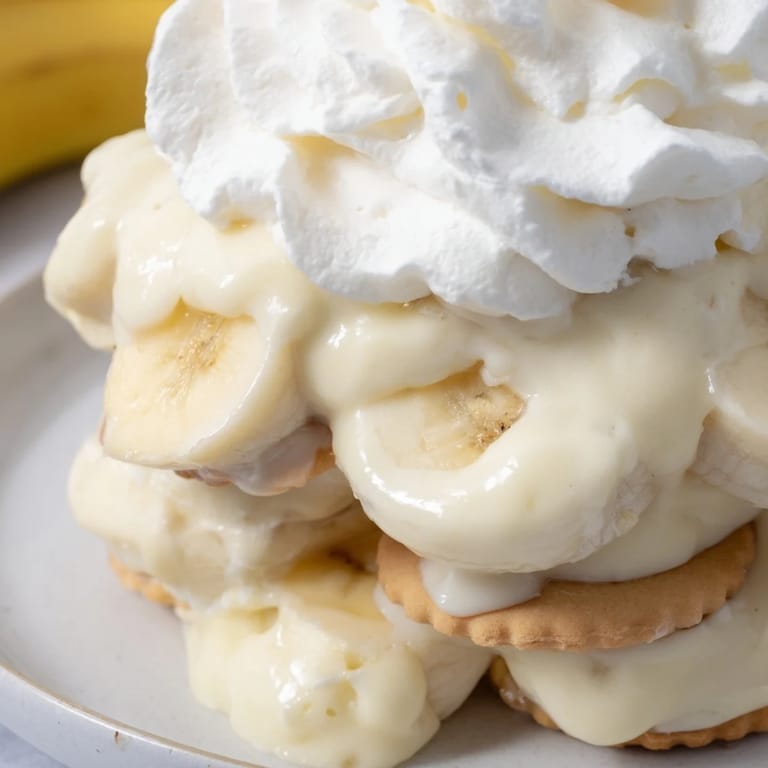
- Layer in your dish:
- In a 2 to 2.5 quart serving dish or trifle bowl, spread one-third of the wafers on the bottom, then one-third of the banana slices, then one-third of the pudding. Repeat two more times, ending with pudding on top.
- Let it rest:
- Cover and refrigerate for at least 2 hours so the wafers absorb moisture and the flavors marry. Longer is fine; overnight is actually better.
- Make the topping:
- Just before serving, whip cold heavy cream with powdered sugar and vanilla until soft peaks form, then spread or pipe over the pudding. If you overbeat it, you'll have butter; stop while it's still fluffy.
 Save
Save There's a moment, usually the next day when I pull this from the fridge and take the first spoonful, where I remember why this dessert has survived generations. It's unpretentious, but it's also the kind of thing that makes people slow down and taste it properly.
Choosing Bananas That Won't Disappoint
Underripe bananas will be starchy and bland, overripe ones turn the pudding brown and mushy, so hit that sweet spot where they're golden and still hold their shape when sliced. I learned this the hard way after making this dish with bananas that were too soft, and the whole thing turned an unappetizing color within hours. Now I always slice them right before assembling, which keeps them from browning and gives you that fresh flavor in every bite.
The Wafer Situation
Store-bought vanilla wafers are your friend here, but not all brands are equal; some are too thin and disappear, others are too hard and stay crunchy no matter how long they sit. The better ones absorb the pudding slightly and become tender without disintegrating, which is exactly what you want. I've tried using lady fingers or homemade wafers, and while they're interesting, they don't have that nostalgic texture that makes this dish what it is.
Timing and Storage Wisdom
Make this in the morning or early afternoon for an evening meal, which gives it time to chill and the flavors to meld without you being rushed. It's best served within 24 hours because after that, the wafers continue to soften and eventually the whole thing becomes more of a pudding than a layered situation, which is fine but not the intended experience.
- You can make the pudding up to two days ahead and store it separately, then assemble a few hours before serving.
- If your dish sits in the fridge longer than 24 hours, the whipped cream on top will weep liquid, so add that right before serving.
- For a meringue topping instead of whipped cream, spread whipped egg whites over the pudding and bake at 350°F until lightly golden and crispy.
 Save
Save This dessert is a reminder that the simplest things, when made with intention and good ingredients, are often the ones people remember. That's worth every minute of your time.
Recipe FAQs
- → What type of milk works best for the pudding?
Whole milk provides the creamiest texture, but low-fat milk can be used for a lighter variation.
- → How do I prevent lumps in the pudding?
Gradually whisk the milk into the dry ingredients and stir constantly over medium heat until thickened to ensure a smooth pudding.
- → Can I prepare the dessert ahead of time?
Yes, assemble and refrigerate it for at least 2 hours to meld flavors, and it's best served within 24 hours for optimal freshness.
- → What alternatives exist for the whipped cream topping?
You can use light whipped topping or a meringue topping baked until lightly golden for different textures.
- → How should the layers be assembled?
Alternate layers of vanilla wafers, banana slices, and pudding three times, finishing with pudding on top before adding whipped cream.
- → Are there common allergens I should be aware of?
This dessert contains milk, eggs, and wheat found in vanilla wafers; may also contain soy depending on wafer ingredients.